How to enable my FTP account?
You can download your completed edits through FTP — a convenient choice for handling large files or high-volume orders.
Just follow the steps below to quickly enable your FTP account:
Step 1: Log in to your Path account
Click the “Log in” icon located in the top right corner of the website, then enter your email address and password.

💡 Need help signing in? Follow these simple login steps.
Step 2: Go to "My Account"
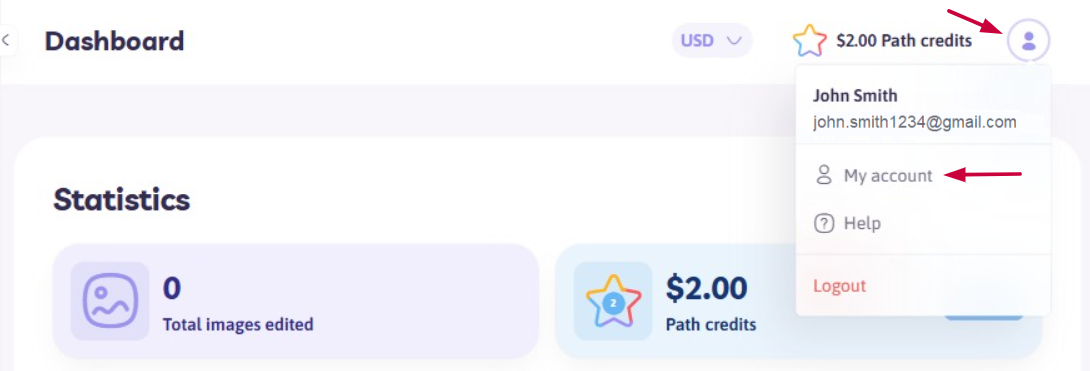
Once logged in, click your account icon in the top right corner of your personal dashboard. Then, select “My account” from the dropdown menu.
Step 3: Open the “FTP Account” Tab
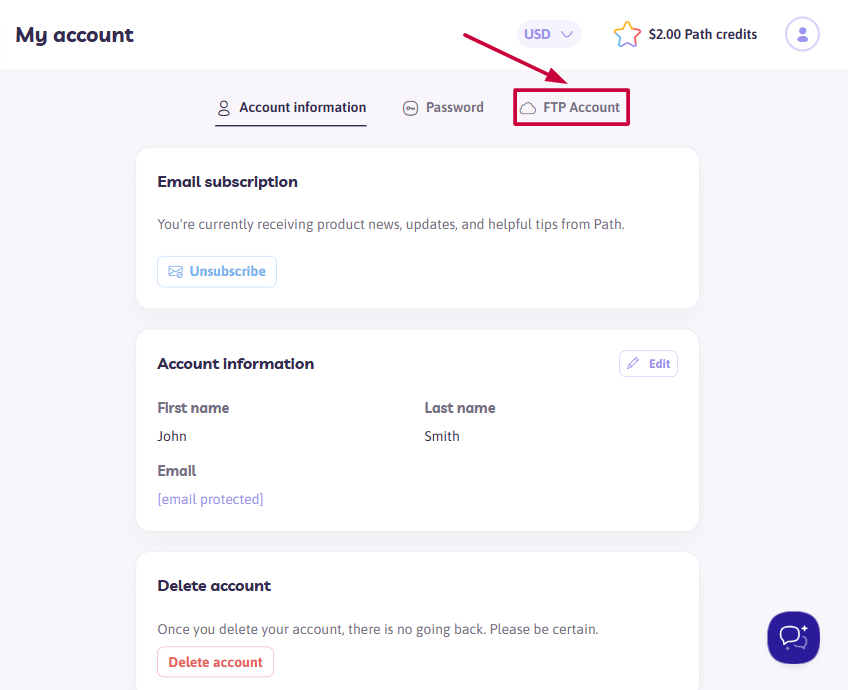
On the My Account page, click the “FTP Account” tab to access your FTP settings.
Step 4: Click "Enable FTP account"
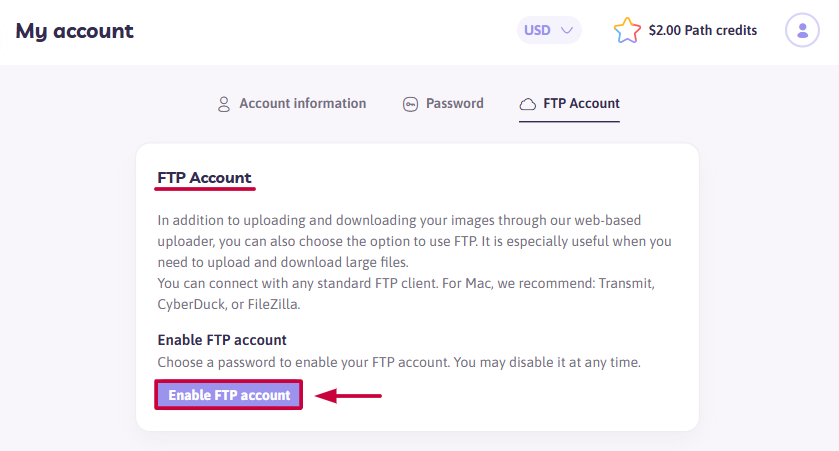
In the FTP Account section, click the "Enable FTP account" button located at the bottom left corner.
You’ll be redirected to the Enable FTP account page.
Step 5: Set Your FTP Password
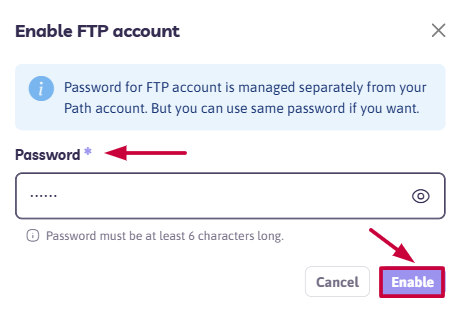
On the Enable FTP account page, create your FTP password and click “Enable.”
🔎 Important Notes
- Passwords are case-sensitive (e.g., "Password" and "password" are treated as different).
- Make sure your new password is at least 6 characters long and unique for your security.
- You can disable your FTP account at any time via the same tab.
Step 6: Connect to the FTP server
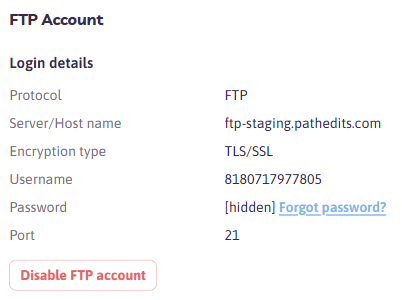
Once enabled, you'll be redirected back to the FTP Account tab and shown your login details. Use them to connect through any standard FTP client and start downloading your files!
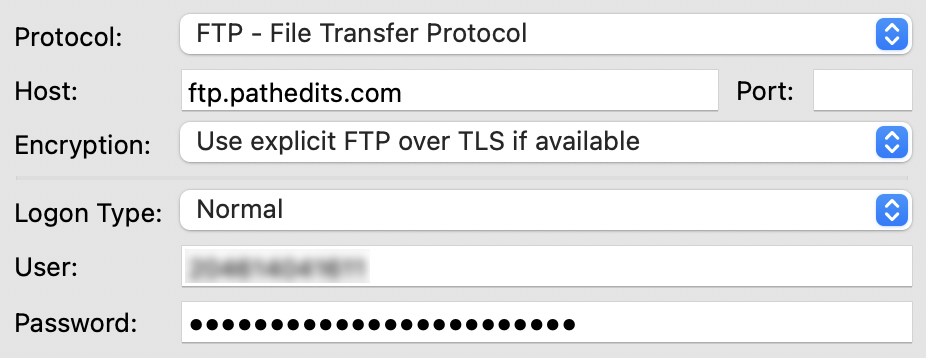
If you are using FileZilla, the connect screen should look as follows:
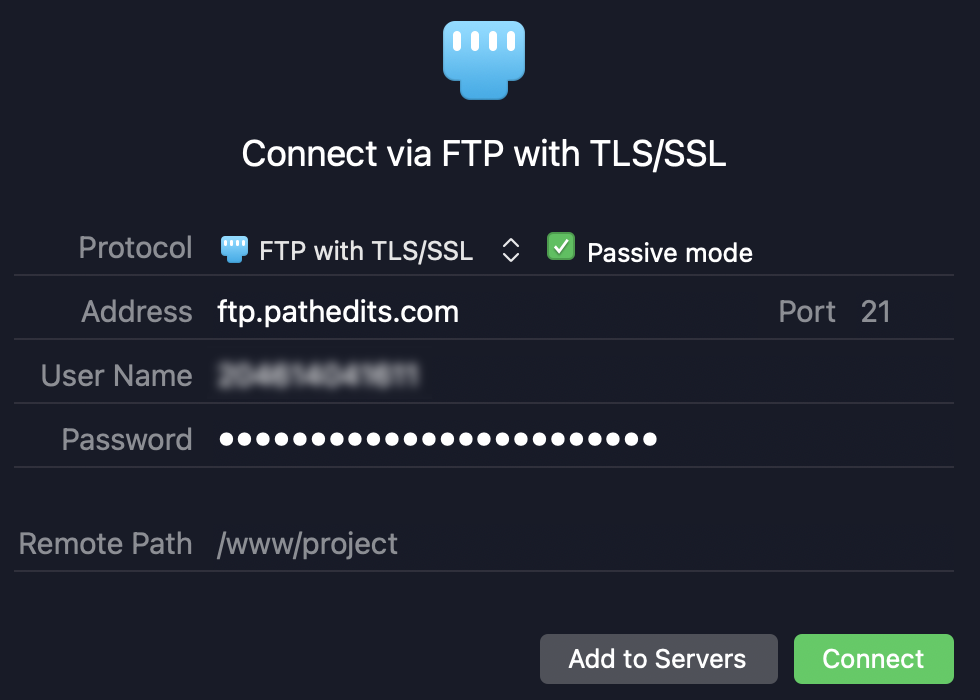
If you are using Transmit, the connect screen should look as follows:
Need help along the way?
Our support team is here for you! Just reach out anytime.